- 10-08-2026
- 0
How to install a garden drip irrigation system
Having a healthy and vibrant garden does not have to be complicated or time-consuming. With a drip irrigation system, you can make sure that each plant receives the right amount of water directly where it needs it most.
From installing drippers and bubblers to adding an automatic timer, setting up a drip irrigation system can be simple and efficient. Follow these steps to create an effective irrigation system that helps your plants grow healthier while reducing water waste.
Connect the System to a Water Source
The first step in installing a drip irrigation system is connecting it to a reliable water source. In most cases, this will be a garden hose or an outdoor water tap. If you have a rainwater collection barrel, you can also use it as a water source if the system is properly designed for it.
Before installation, check whether your water source provides sufficient pressure. A pressure gauge can be used to measure water pressure in pounds per square inch (PSI).
Most drip irrigation systems require a minimum water pressure of around 20 PSI to operate effectively. If the pressure is too low, a booster pump may be required.
Water quality is another important consideration. Dirt, sand, and other debris can clog irrigation tubing and emitters, reducing the efficiency of the entire system.
To prevent blockages, install an appropriate water filter before the water enters the irrigation tubing. The filter helps remove sediment and other particles from the water.
Once you have checked the pressure and installed the filter, connect the main irrigation line to the water source.
For a convenient, automated system, you can also install a watering timer. A timer allows you to schedule when the system turns on and off, so your garden can be watered automatically.
Run 1/2-Inch Tubing to Your Planting Area
Choosing the right tubing size is an important part of designing a garden irrigation system.
For many home gardens, 1/2-inch tubing is a practical choice because it provides a good balance between water flow and pressure.
Before laying the tubing, plan your garden layout and decide where each watering device will be installed. This will help you determine the most efficient route for the main irrigation line and calculate how much tubing you need.
Start by connecting the tubing to the water source and running it along the garden beds.
Use stakes or clips to secure the tubing to the ground and prevent it from moving.
Pay attention to potential obstacles such as rocks, tree roots, pathways, and garden structures. Adjust the route of the tubing where necessary to ensure a smooth installation.
Once you reach the end of the irrigation line, cap the tubing to prevent water from escaping.
You can then connect individual watering devices, such as drip emitters or sprinkler heads, to the main line.
Use 1/4-Inch Tubing to Position Watering Devices
Every plant has different water requirements. This can make irrigation challenging, especially in larger gardens containing different types of plants.
1/4-inch tubing provides a flexible way to connect individual watering devices to the main 1/2-inch irrigation line.
The smaller tubing can be connected to the main line and then routed directly to individual plants.
Drippers, emitters, or other watering devices can be attached to the end of the tubing and positioned near the base of each plant.
One of the main advantages of 1/4-inch tubing is its flexibility. As plants grow throughout the season, you can easily reposition the tubing and watering devices to provide water where it is needed.
This makes the system more adaptable and helps ensure that plants receive consistent and efficient irrigation.
Attach the Watering Devices
There are several types of watering devices that can be used with a drip irrigation system.
Drippers
Drippers, also known as spot watering emitters, deliver water slowly and directly to the base of individual plants or groups of plants.
They are particularly useful when precise watering is required around the plant's root zone.
Bubblers
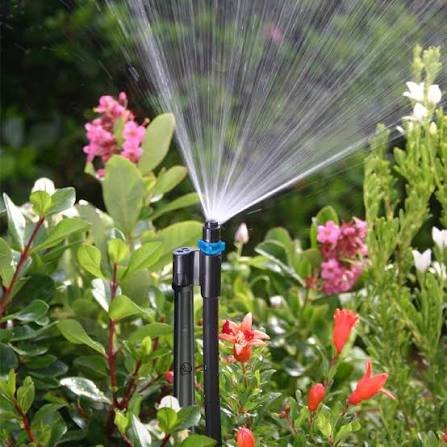
Staked bubblers are suitable for larger areas and containers. They provide greater flexibility because their water flow can often be adjusted from a slow drip to a stronger stream.
Emitter Tubing
For long rows of plants, planters, and window boxes, 1/4-inch emitter tubing can be an excellent option.
Emitter tubing has built-in water outlets positioned at regular intervals, allowing water to be distributed evenly along the length of the planting area.
Tip: If you have a small garden, a ready-made drip irrigation kit can be a convenient starting point. Many kits include the essential components required to set up a basic drip irrigation system, while a timer can be purchased separately.
Secure the Irrigation Tubing
Once the tubing and watering devices have been installed, secure the tubing using irrigation stakes or clips.
Properly securing the tubing prevents it from moving, becoming disconnected, or being accidentally damaged.
It also helps keep the emitters in the correct position so that water is delivered directly to the intended plants.
Add a Timer to Automate Your Irrigation System
For greater convenience and efficiency, consider adding an automatic irrigation timer to your drip irrigation system.
A timer allows you to program specific watering schedules and automatically turn the water on and off.
This can save time, reduce unnecessary water consumption, and help maintain consistent moisture levels in your garden.
Instead of manually turning the water on every day, simply program the timer according to the needs of your plants and let the irrigation system handle the rest.
Conclusion
A properly designed drip irrigation system can deliver water directly to plant root zones, reduce water waste, and make garden maintenance easier and more efficient.
When installing a garden irrigation system, pay attention to water pressure, filtration, tubing size, the correct placement of watering devices, and automation.
For a small garden, a simple drip irrigation kit may be sufficient. For larger gardens, landscaped areas, or professional projects, a properly designed and professionally installed automatic irrigation system can provide better coverage, efficiency, and long-term performance.